


Blogs
Enhance your well-being with physiotherapy – fostering strength and flexibility for a healthier life.

How to avoid back pain when working from home
24.10.2023
Is working from home a pain in your back?
Back pain is incredibly common. We’ve all had those twinges from time to time, maybe after a bit of gardening or if we’ve been sitting in front of a computer for hours on end. In fact, with so many of us working from home just now there has been an big increase in reported concerns with back pain and the evidence is clear that spending too much time being inactive can not only be bad for our backs but can delay any recovery from niggles and pains. So, keeping the muscles in our back strong will ensure a well supported spine which in turn will help to keep back aches at bay.
80% of us will experience back pain in our lives, most commonly in our lower backs, and more often than not it’s a nuisance that lasts for just a few days and is unlikely to be something to be concerned about. However, given how inactive our modern life can be and how common back pain can be, it’s good advice to stay ‘back aware’ and to regularly practice good form to avoid doing damage that will affect us in the longer term.
How to prevent WFH back pain
Here are some simple ways you can look after your back if you’re working at your desk from home right now.
Sit on the edge of your chair to keep your spine upright and posture in a neutral position.
Use a lumbar support fitted to the back of your chair or a comfortable curved back cushion to ensure you’re sitting in a good position all day
When you can, sit on the floor some times instead of a chair or sofa.
Get up from your chair and walk around every 20 minutes.
Stretch your legs outwards while sitting which helps to maintain and improve hip function and mobility.
Stand up at your desk or elevate your workstation using items such as books or boxes at home.
Take the time to perform a full-range hip movement (using the legs for support) and brace the lower back when standing up and sitting down – this avoids placing stress on the lower back and distributes the movement throughout the entire body
Take up swimming (when your local Covid restrictions allow) as it’s fantastic for strengthening muscles without experiencing impact. Regularly practice yoga and pilates to maintain and improve flexibility.
Historically, GP’s would recommend bed rest as a remedy to mild or medium back pain. Now we know that regular movement is key to alleviating stiffness and pain related to the spine and lower back. So the big message to take home is keep active - even when you’re sitting down!
When to seek medical help
Although back pain in most cases will clear up after a couple of days it’s absolutely essential that you immediately seek urgent medical care if your pain persists or if you experience any of the following symptoms:
Numbness in your legs or bottom
Loss of sensation or control in your bladder or bowel
Numbness in your lower back and back passage
Sudden, severe spinal pain when lying down
Tenderness in the spine
Fever
These symptoms could be a sign of something very serious indeed and you should urgently seek care if you experience these. You can also check out our post on various causes of tiredness here for more awareness.
Becoming ‘back aware’ is key to maintaining great back health for life. Maintaining good posture now while you’re working from home is the best insurance policy you can have for the future of your back and spine. Keep active and keep back strong!
Need more support? We're always here to help.
For all your Medical and Homecare supplies give us a call at Mediworld.
We have over 40 years experience in medical, surgical and home health supplies and we're always on hand to chat if you need support or advice. Follow us on Twitter and Facebook.
Learn More Now
How to Reduce Swollen Feet and Ankles
24.10.2023
Swelling or inflammation in the feet and ankles is pretty normal, especially if you’ve been standing for a long period of time or you’re pregnant or feeling very hot. More often than not the body is more than capable of flushing the system and reducing the swelling quickly and on its own.
However, in some people, swollen feet and ankles can last for longer periods of time, becoming uncomfortable and even painful. When this happens it can become difficult to move or walk.
So when is it time to seek medical help for swollen feet and ankles, and how can you manage the symptoms at home by yourself?
What causes the swelling?
Sudden swelling or inflammation in the ankles (or feet and legs) is usually referred to as Oedema. It’s what happens when your body retains excess fluid in your lower legs, ankles and feet and most often will affect both sides of your body at the same time.
It can become uncomfortable and can sometimes prevent you from moving freely.
The usual causes are:
Standing or sitting in the same position for too long
Eating too much salty food
Being overweight
Being pregnant
Taking certain medicines (such as some blood pressure medicines, contraceptive pills, antidepressants or steroids)
But other, more serious factors, can cause sudden inflammation in the ankles, feet and knees, and should always be checked out by your GP:
An injury (e.g. strain or sprain)
An insect bite or sting
Problems with your kidneys, liver or heart
A blood clot or an infection
What you can do to ease ankle swelling
It’s useful to help to get the fluids moving and to increase the circulation in the body to allow the area to drain. There are a few ways you can help the body to kickstart its drainage system and help to reduce the swelling.
Elevate your Legs
Lie down with your feet on a good, supportive foot pillow or a leg raise cushion. For swollen knees you could try one of these knee pillows.
Keep Moving
Encourage drainage with some gentle movement like yoga, walking or cycling. When the circulatory system is flowing, there is less chance of developing pools of fluid around the ankles and feet, for example.
If getting outside is difficult for you, or you spend a lot of time sitting down, you could try using an at home pedal exerciser or do some ankle movements with exercise bands for a bit of extra resistance.
Massage
With more serious swelling, a physiotherapist might be assigned to give you some lymphatic drainage. But if your symptoms are less serious you can try to give yourself a gentle massage in and around the affected area using a lotion or massage cream to ease the movement across the skin.
Check your Footwear
A surprising amount of swollen ankles and feet come from wearing inappropriate or ill-fitting shoes. Wear comfortable shoes without heels that don't pinch or go above the ankle and if you can, have a specialist shoe fitter check if your shoes are supporting your feet well. When you’re in the house, wear a pair of wide-fitting, supportive slippers.
Hydration and Nutrition
Often swelling happens as a result of lifestyle or dietary habits.
Water retention and the swelling that comes with it can be a sign of magnesium deficiency. Adding magnesium-rich foods to your diet, like nuts, legumes, spinach and dark chocolate, can help.
Although it may sound contradictory, drinking more water will reduce the amount of fluid retention in the body. When you’re dehydrated your body will detect that it needs to hold onto the limited fluid it has, which will result in pools of fluid appearing in areas around the legs and joints. Staying hydrated helps to keep the body flushed and clear of excess sodium and waste around your system.
When to Seek Help
If the symptoms don't improve after a few days or if the swelling gets worse or occurs in only one side of the body, the NHS recommendation is to consult your GP.
Need more help?
For all your Medical and Homecare supplies give us a call at Mediworld.
We have over 40 years experience in medical, surgical and home health supplies and we're always on hand to chat if you need support or advice.
April 2023
Learn More Now
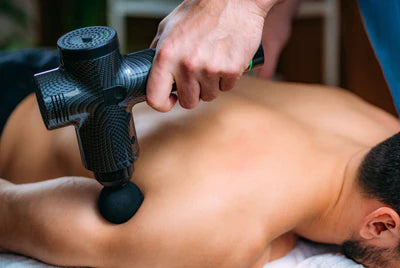
5 Reasons to use a Massage Gun
24.10.2023
Very few things feel better than a good massage! When you’re feeling aches and pains, tightness or a bad case of muscle soreness, massage can really help to ease out those niggles, reduce stress and make you feel yourself again.
But, not all of us can afford the time or money to see a massage therapist whenever we want to and, for that reason, hand-held massage guns have become an increasingly popular therapy tool to have and use at home.
Massage guns deliver percussion therapy, a clinically proven, safe to use at home treatment for deep muscle relief and the potential benefits of using a massage gun include:
Reducing Muscle Pain and Aches
Probably one of the top reasons why people reach for a massage gun is to reduce muscle soreness, tension and stiffness.
If you’re an athlete or you enjoy regular exercise that can sometimes leave you feeling tight or sore afterwards, it’s recommended that you use your massage gun as soon as possible after you’ve finished your workout. Massage has been proven to help reduce the severity of delayed-onset muscles soreness (or DOMS) brought on by intense exercise. Massage therapy directed towards a sore muscle encourages the muscles and its thousands of fibres to relax and become much less taut.
As we age, regular massage can be hugely beneficial in easing stiffness across the body.
Increasing and Improving Circulation
Massage is a fantastic way to stimulate blood flow around the body. Percussive therapy, which is recreated by the pulsing action on a massage gun, is one of the best ways to improve circulation and increase the levels of oxygen and good nutrients flowing through your system. Higher rates of oxygen and nutrients in the blood are essential for muscle recovery and healing.
With better circulation the body is also better able to flush away the excess lactic acid in the muscles that builds up during exercise, thus speeding up recovery.
Making you More Flexible and Mobile
If you regularly exercise you might suffer from tight hamstrings for example (from running, playing tennis, cycling or lifting weights) which can decrease your ability to, say, touch your toes or bend down to lift things from the ground.
Using a massage gun before you workout or as part of a daily warm up routine can effectively loosen out those tight hamstring muscles. This will give you an easier stride, and can reduce the potential of any injuries associated with tight muscles.
Regardless of exercise, any of us can suffer from tightness in our larger muscle ranges which have a huge impact on posture, movement and mobility. So using the percussive therapy of a massage gun can actively encourage better and looser movement from those muscles.
Better flexibility can be found after just 10 minutes of massage gun use a day.
Reducing Stress
In addition to its calming effects, massage therapy can help alleviate the symptoms of psychological anxiety and using a massage gun at home is equally effective when used for relaxation.
Percussive therapy is excellent at lowering the stress hormone cortisol and studies have shown that it can be reduced by a significant amount (up to 30%) in just one massage session. Having too much cortisol can lead to excess pain, stress levels and a suppressed immune system. Massage flushes out cortisol from the blood flow and replaces it with positive hormone endorphins, serotonin and dopamine. Replacing cortisol with positive hormones decreases stress and increases relaxation.
Massage has been shown to relieve stress levels and improve the wellness of elderly people, many of whom suffer from greater levels of anxiety. It has even been seen to improve patients who suffer from strokes or dementia to feel more relaxed and comfortable.
Improving Sleep
As well as reducing stress and anxiety levels, using a massage gun as part of your bedtime routine can help you nod off quicker and enjoy better, healthier sleep.
By targeting the areas of the body that tend to have built-up tension, like the neck, lower back, forearms, quads, shins, and feet, massage can help to relax and remove any aches or restlessness that appear at night.
Using the lighter pressure setting on your massage gun and targeting those areas for just 30 secs each will activate the parasympathetic nervous system (or the rest and digest system) and promote a good night’s sleep.
Need more help? We're always here to help so get in touch today.
For all your Medical and Homecare supplies give us a call at Mediworld.
We have over 40 years experience in medical, surgical, mobility and home health supplies and we're always on hand to chat if you need support or advice and don't forget to read our other great health blogs!
Learn More Now

The Benefits of Compression Therapy
30.10.2023
Compression therapy is often associated with athletes - you might have seen runners using compression socks or even large, air compression devices to aid their recovery after a taxing event or race.
But humans have been using compression therapy to heal wounds and aches or pains caused by inflammation for centuries. And today, compression therapy is known to be a hugely effective form of treatment for a whole host of conditions.
How does it work?
Compression therapy uses controlled pressure to increase blood flow in your legs and improve blood flow to the heart. At the same time, it supports your veins and decreases swelling.
Through gentle compression, blood circulation is boosted and helps to keep lymph flowing through the body. Consistent blood flow relaxes the muscles and lymph flow drains toxins and metabolic wastes from the body. Mobility is increased, inflammation is reduced and by removing long-term sluggish blood flow the risk of developing chronic disease is greatly reduced as well.
What is it used for?
Compression socks and air compression massagers are used to effectively relieve and prevent a number of common conditions including:
Varicose Veins
Maintaining and relieving symptoms of Lymphedema
Preventing leg swelling or deep being thrombosis in people who stand or sit/lie for long periods of time e.g during flights or while recovering after surgery
Healing Leg Ulcers
Managing Arthritic pain
Aiding recovery after exercise
What kind of compression treatments are there?
Compression treatment can often take place at home with something as simple as a pair of compression stockings or a compression sleeve. You can even use an air compression massager at home to provide relief from symptoms and to regularly improve your body’s circulation and blood and lymph flow.
If you’re wearing compression stockings or socks to treat varicose veins you will usually put the stockings on first thing in the morning to keep the leg valves in the right position and to support healthy blood circulation in your legs throughout the day. You should usually remove them to sleep.
Similarly, if using a compression sleeve or sock for lymphedema, it’s recommended that you put it on first thing in the morning when the swelling is at a minimum. The stocking will help to drain fluid from the tissue in the affected limb throughout the day, preventing too much swelling and inflammation as the day goes on.
Arthritis sufferer can find considerable relief from using compression gloves. Compression on the hands helps to reduce swelling, increase joint mobility and manage pain throughout the day.
Compression Therapy for Athletes
If you’re currently training for a marathon, for example, you might benefit from using compression socks during your runs and, importantly, as part of your recovery programme.
Compression socks help to decrease the amount of time it takes for runners to recover because compression socks help to reduce post-run swelling and fatigue by increasing the blood flow to the muscles and joint tissues. This makes it easier for your body to get the nutrients it needs to perform to the best of its ability and recover quickly.
Similarly, if your workout has been particularly long or intense (did we mention the marathon?) your recovery will be aided even more by using air compression boots.
Air compression boots are inflatable sleeves for the legs that fill with air and squeeze your legs to increase the blood flow.
The boots pulse and use compression to essentially give your legs and feet a lovely massage, encouraging blood flow and helping you recover after your strenuous workout. Recovery is faster and will help you to get back to running quicker and more safely afterwards.
Is compression therapy always safe?
Sometimes when compression is needed to treat a health condition, compression stockings or boots are ruled out for a variety of reasons. If the following applies to you you should avoid compression therapy at home and speak to your GP to discuss your options.
Avoid compression stockings or boots if you have:
Open sores
A skin condition that makes skin fragile
Cellulitis
Lack of sensation in the area
Peripheral arterial disease
Severe peripheral neuropathy
Compression Therapy has been long established as a highly effective way to maintain good blood circulation, which in turn promotes great health and lower inflammation.
If you stand up all day at work, or sit at a desk for hours on end you could benefit from regular use of compression stockings to keep you pain free, prevent varicose veins, thrombosis, ulcers, pain and lack of mobility.
Similarly if you’re recovering from surgery or from a tough exercise regime, compression therapy is known to decrease the inflammation and joint pain you’ll be experiencing and get you back to your healthy self as soon as possible.
Need more help? We're always here to help so get in touch today.
For all your Medical and Homecare supplies give us a call at Mediworld.
We have over 40 years experience in medical, surgical, mobility and home health supplies and we're always on hand to chat if you need support or advice and don't forget to read our other great health blogs!
March 2023
Learn More Now

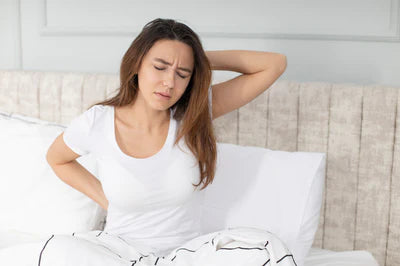
Using a Back Support Belt for Back Pain
24.10.2023
Lower back pain can be, well, a real pain in the back! It’s something that almost half of us will experience at some point each year, and is one of the most common reasons for people to visit the GP for a remedy.
A back support belt can be a very effective solution to minor lower back ailments, but is it right for the aches and pains you’re feeling in your lower back right now?
Read on to find out.
What Does a Support Belt Do?
A back support or lumbar support belt is worn around the lower back area in order to support the lumbar section of your spine, and hold it in a neutral, hopefully pain-free position.
It's a really effective solution for back pain sufferers providing relief from the aches and pains associated with muscle fatigue, sciatica, herniated discs, scoliosis and general weakness of the core.
Belts are usually adjustable, lightweight, discreet and comfortable to wear, and some will feature compression, bio-magnetic inserts to increase blood supply and speed up recovery.
Pros of Using a Back Support Belt
Wearing a back support belt during periods of lower back pain can give extra support when switching between lying down, sitting, and standing.
If you've had a back injury, too much movement can limit your body's ability to heal. Back support belts limit movement and range of motion so that your body has a chance to heal properly.
Improves Posture - it’s easier to maintain a better posture while using a lumbar support belt as it forces you into a position where your back is straight and your shoulders/upper back remain unrounded. Wearing a back support can help to train your body into a better back position and posture for life.
Long Term Back Care
Back support belts can be helpful in lots of circumstances, but as always prevention is key to keeping your back strong, healthy and pain free.
Here are some simple ways you can look after your back for long term back health.
Check your sitting position. Sitting on the edge of the chair will help to keep your spine upright and your posture in a good, neutral position. This will strengthen your core muscles which support good back function all round.
Avoid sitting for long periods in soft, ‘comfortable’ chairs. Even worse, do not sit in your bed to work! Your back needs a harder seated surface to allow good posture to occur.
If you’re struggling to find a comfortable position while seated use a lumbar support fitted to the back of your chair or a comfortable curved back cushion to help with sitting in a good position all day
Strengthen your core muscles with short bursts of exercise every day. Low impact walking is great for core muscles, as is swimming or sitting on an exercise ball while doing simple movements to engage your core.
Be careful while lifting. Simple things like lifting shopping bags into the car or onto a table can be enough to cause back injury. Be sure to bend your knees while lifting, always pivot from your feet and hips - not your back, and hold objects close to your chest while straightening your spine.
Need more support? We're always here to help.
For all your Medical and Homecare supplies give us a call at Mediworld.
We have over 40 years experience in medical, surgical, mobility and home health supplies and we're always on hand to chat if you need support or advice - don't forget to read our other great health blogs!
January 2023
Learn More Now
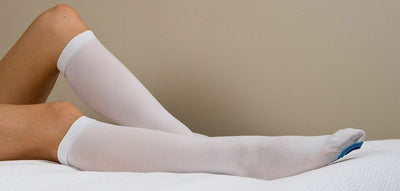
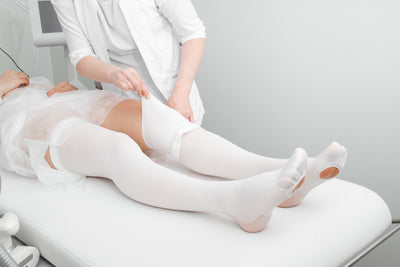
Anti Embolism VS Compression Stockings: You Should Know
26.09.2023
Anti-embolism stockings are made of elastic and can be as long as the thigh or as short as the knee. They can help to prevent blood clots by gently squeezing your legs together. This makes your blood flow faster and keeps your leg veins from enlarging. This helps prevent blood from pooling in your legs and clotting over time.
How To Use Anti-Embolism Stockings
Before using the stockings, ensure your legs are precisely measured using a fitting chart. This should be administered by a nursing team member who has received the necessary training. Furthermore, if your leg size changes or your stockings become uncomfortable, your leg should be remeasured and evaluated.
Wear the stockings at all times during your hospital stay. You should wear them until your mobility returns to normal or improves. When you are discharged, your nurse will provide more information on how long you will still use it at home.
Every day, stockings should be removed for no more than 30 minutes. Your legs should be cleaned and checked for injury, discolouration, and pain.
Allowing your stockings to roll down will result in a tight band, creating constriction and affecting your blood flow.
Avoid using greasy ointments, oils, and lanolins on your skin since they will harm the elastic fibres of your stockings.
When moving about, please wear slippers or shoes because stockings can be quite slippery on hard flooring.
Putting on the stockings might be tricky. As a result, the elderly and those with disabilities may require assistance from a caregiver or family.
How To Put On Anti-Embolism Stocking, A Step-By-Step Process For You
Insert your hand up to the heel of the stocking.
Keeping your hand inside, flip the stocking inside-out to the heel.
Slip the stocking over the foot. Make sure the heel is centred in the heel pocket on the stocking. If the heel fits, the inspection hole will be under the foot. In certain circumstances, the stocking will overhang the foot, which is okay.
The essential thing is that the heel square is in the correct position; if a portion of the stocking overhangs the toes, it may be tucked into your slipper.
Pull the stocking up and around the ankle and leg. Then, pull the remaining stocking up to its maximum length, ensuring no creases exist.
For full-length stockings, ensure the stocking fits snugly enough to allow the knee and thigh to flex. The gusset is located in the centre, on the inside thigh.
How To Choose And Use Compression Stockings
When choosing suitable compression stockings, you have to consider that the appropriate amount of pressure and kind of stocking is determined by the number, type, and underlying cause of a person's varicose veins.
There Are Three Types Of Compression Stockings
Graduated compression stockings: The amount of compression in graduated compression stockings is at maximum at the ankle and progressively reduces towards the top. They are intended for mobility and to fulfil particular length and medical strength standards. This type of stocking requires a professional to fit the graduated compression stockings.
Stockings just below the knee reduce peripheral edema or lower leg swelling caused by fluid accumulation, while stockings that reach the thigh or waist assist to minimize orthostatic hypotension by reducing blood pooling in the legs.
Anti-embolism stockings: Anti-embolism stockings help to lower the risk of deep vein thrombosis. They give gradient compression, similar to graded stockings. However, the degree of compression varies, and these socks are intended for people who are unable to move.
Nonmedical support hosiery: Nonmedical support hosiery often does not require a prescription. They include elastic support hose and flying socks, both marketed as potential remedies for tired, aching legs. These socks provide consistent compression while putting less strain on the skin than prescription compression stockings.
How To Wear Them
First, before you put them on, hand wash them. It will make them more adaptable and easy to wear. If you can afford it, consider purchasing a second pair. That way, you'll have a clean pair to wear while the other is being washed.Then, before wearing them, apply a dressing to open wounds (if there are any) and ensure to keep your stockings near your bed so you can put them on first thing in the morning.
To Put Compression Stockings On, Here’s A Step-By-Step Process For You
Do it first thing in the morning when your legs are the least swollen. Sit in a backless chair. This provides something to lean on when putting on your stockings.
With one hand, grasp the top of the stocking. Then, reach inside the stocking with your other hand and push your arm all the way through until you reach the end and can hold the toe.
Pull your hand back up through the stocking, turning it inside out but leaving the tips of your fingers in the toe of the stocking after you grasp the toe well.
Insert your toes into the stocking's toe and gently roll and slip it back over your heel. Then, carefully roll and slide the stocking up your leg using your fingertips or palms.
Avoid grabbing and pulling at the top of the stocking, as this might cause it to rip or tear.
Compression stockings can be worn daily and they should be tight yet pleasant if they fit your size correctly. Wear them all the time unless you're showering or sleeping. Also, ensure to replace your stockings every four to six months.
Considerations and risks
Compression stockings, like any other medical instrument or device, have their own set of risk factors to consider, such as;
Incorrectly used compression stockings can cause complications such as skin breakdown, according to a 2014 case report.
According to a 2014 report published in the Canadian Medical Association Journal, compression stockings might aggravate ischemia or insufficient oxygenated blood flow.
A 2007 research revealed complaints of peripheral nerve injury caused by improper compression stocking usage.
Why do people use them?
Since, compression stockings are tight-fitting, flexible socks that gently compress your leg. There are several reasons why people use them daily or as prescribed by their physician. These socks are of great help when it comes to the following;
Increasing blood flow.
Prevent fluid accumulation in the legs.
Relieve symptoms associated with varicose veins, skin ulcers, and deep vein thrombosis.
Preventing difficulties caused by skin ulcers.
Conclusion
Anti-embolism and compression stockings differ in function, construction, compression degree, and length of usage. Anti-embolism stockings are used to avoid blood pooling and lessen the risk of blood clots (embolisms). Therefore, these stockings are highly suitable for post-operative or immobile patients.
On the contrary, compression stockings are designed to enhance blood circulation. They are intended to address the demands of mobile (ambulatory) patients who undergo treatment for edema, chronic venous insufficiency, varicose veins, and lymphedema. It is also used to prevent swelling during pregnancy.
Regarding design, anti-embolism stockings are only available in white and contain a tiny hole around the toes for monitoring the patient's circulatory health. On the contrary, pressure socks and compression stockings are available in various patterns and hues.
In simple words,
If the patient is in bed, anti-embolism stockings should be worn
If the patient can walk, medical graduated compression stockings are recommended.
FAQs
What can I do if I’m having trouble putting the stockings on?You can use rubber gloves to assist you to hold the fabric when putting the stockings on. In some cases, use silicone lotion (such as ALPS) or talcum powder for your legs. If your stockings include latex, or if you are unsure, avoid using other types of lotions or creams on your legs while wearing the stockings. You can also consider using a "stocking butler," a metal contraption that holds the stocking open as you step into it. However, you should try one before you buy one. They might be challenging to use. Lastly, Consult your doctor or a qualified fitter at your local medical supply store for further assistance.
When can I take off my stockings? You may remove your stockings before bed and put them back on first thing in the morning to wear them during the day.
Learn More Now
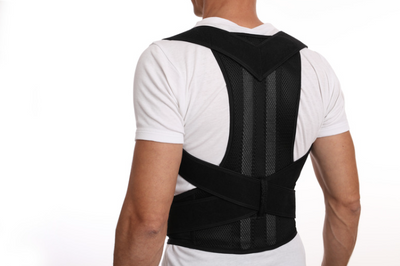
How to Fit and Wear a Posture Correcting Brace
25.09.2023
Consider bad posture to be your nemesis! Slumped shoulders, hunched backs and poor posture can lead to all manner of aches and pains - and in this world of mobile phones and desktop computers, our posture is greatly suffering.
But if you’ve started to notice that you’ve become curved over and are struggling to sit or stand up correctly with good posture, or maybe you’re experiencing back and shoulder pain, fear not. When worn discreetly, a posture correcting brace really can effectively help to straighten you up and ease those tensions in your spine.
What does a posture brace do?
The purpose of a posture brace or corrector is to train your muscles into the correct position for proper posture. The more you use it the better your muscles will learn to hold you in good form. The posture brace will actually force your body into the right position with shoulder straps so that your spine, shoulders, upper and lower back and chest muscles sit where they should be.
Using a posture correcting brace regularly will help to reduce your slouching, improve poor posture, and train you to stand up straight – even after you take it off.
What’s wrong with bad posture?
Apart from making you look older than you might be, bad posture can lead to chronic pain, degenerative joints and discs, injuries and even osteoarthritis. When you sit or stand ‘incorrectly’ you create an imbalance in your body, or weak or tight muscles that eventually lead to aches, pains and problems further down the line.
How to choose a posture brace
There are different types of posture correctors to choose from. Most fit comfortably over your shoulders, pulling them back to maintain an erect posture, provide stability as well as absorb shocks and protect the spinal cord. Some posture braces are like a simple, strappy waistcoat that sits over the shoulder while other posture correctors are fitted with a steel support inside for added structure and correction.
Whatever style of posture brace you choose you should:
Make sure it is a comfortable fit
Doesn’t rub on any part of your back, front of shoulders
Isn’t so rigid that it forces your body into a position that causes pain or discomfort.
How to Wear a Posture Correction Brace
Place the shoulder strap of posture brace over the shoulders.
Stand up nice and straight in your best posture - standing against a wall offers a good support for your back while you put on the brace
Secure the abdominal straps comfortably around the waist while maintaining your best posture.
Cross straps under armpits and place the shoulder straps through the ribbon on the back of the support.
Secure the shoulder straps comfortably in front so that the brace has a small amount of tension against your body.
Make sure you’re not over tightening the posture brace. It should not be so tight that it is uncomfortable to wear.
You can try wearing the posture brace on top of a thin layer of clothing for a more comfortable fit.
How often to use a Posture Correcting Brace
Unfortunately a posture correcting brace won’t turn your bad, slouching back into that of a prima ballerina’s overnight! However, over time with regular use you can achieve a better posture. Start by wearing your posture brace for 15-30 minutes every day. Gradually add more time as your body gets used to the corrected posture position.
If you feel painful aches or throbs in your shoulders or upper back, or are tired from wearing the brace, even while sitting down, take it off and wear it again the next day or two. Also, if while wearing the brace your body feels tired or the brace feels tight you might need to remind yourself to straighten up and maintain better posture. Remember that wearing the brace will act as a reminder to sit up straight!You may also gradually tighten the brace over time as you work towards achieving a better posture.
Be Patient and ConsistentThe more you use your posture correcting brace, the better your posture will become. Be patient and don't expect results overnight but with consistency you will gradually find yourself standing taller and decreasing your chances of developing posture-induced back, spine and neck pain in the future.
Need more help? We're always here to help so get in touch today.
For all your Medical and Homecare supplies give us a call at Mediworld.
We have over 40 years experience in medical, surgical, mobility and home health supplies and we're always on hand to chat if you need support or advice and don't forget to read our other great health blogs!
November 2022
Learn More Now
Anti-Embolism Stockings: Complete Beginner's Guide
20.09.2023
What are Anti-Embolism Stockings?
What are they?
Anti-embolism stockings are made from elastics and come in a thigh- or knee-length design. They are also often interchanged with the term compression stockings. They are worn by a person who has had a recent surgery, or someone who is at risk of developing blood clots. The stockings are used to prevent blood clots from traveling through the body.
Why do people use them?
They help prevent blood clots by providing mild compression to the legs. Compression stockings are often worn after surgery or medical procedures that have a higher risk of developing blood clots. They are also sometimes worn by people who have recently traveled long distances by car, plane, or train.
How do they work?
According to scientific research in 2014, Anti-embolism stockings helped improve circulation and prevent blood from accumulating in your legs, preventing dangerous blood clots. Compression stockings work by applying pressure to your legs. This pressure forces blood to flow through the veins and towards your heart. Compression stockings can also help prevent swelling and improve symptoms of venous insufficiency.
When should you wear anti-embolism stockings?
Wear anti-embolism stockings as directed by your doctor if you have any condition that causes poor blood flow in your legs, such as swollen and enlarged veins or swelling of your body's tissue. You may need to wear them if you have had surgery on your legs or lower body, including hip replacement. You may also need them after a long flight or car ride if you are at risk of developing blood clots in your legs.
Anti-embolism stockings are not intended for use as a treatment for varicose veins or other conditions affecting blood flow. You should consult your doctor before using these stockings if you have any questions about whether they are appropriate for your individual needs.
If you have the abovementioned problems, anti-embolism stockings should be worn during the day and removed before retiring to bed. First thing in the morning, put them back on.
If you're wearing stockings on both legs, you should receive at least 2 pairs of stockings. This implies that you can wear one pair while washing and drying the other.
Things you need to know before wearing the stockings:
1. Before putting on stockings, ensure you accurately measure your legs using a fitting guide. A nurse with the right level of expertise should perform this. You should get your legs e-measured and your requirement for stockings reevaluated if your legs' size changes or the stockings become unpleasant.
2. During your time in the hospital, you should wear the stockings at all times, day or night. Wear them at home until you can move around normally again, or much better. Your nurse will provide you with additional instructions in this regard before your release.
3. Each day, stockings should be taken off for no more than 30 minutes. Clean your legs and check for cuts, scrapes, and any discoloration or pain in the skin.
4. You should remove your stockings every two or three days, wash them, and replace them with a clean pair.
5. Keep your stockings up at all times; otherwise, the band around your calves will become too tight, limiting blood flow and putting your health at risk.
6. Please stay away from fatty ointments, oils, and lanolins, as they can weaken the elasticity in your stockings.
7. Please wear slippers or shoes when wearing the stockings because they are challenging to put on and might be slippery on hard flooring. Because of this, the elderly and the disabled may require assistance from a caretaker or family member.
How to wear:
1. Insert your hand down to the heel of the stocking.
2. Turn the stocking heel outward while keeping your hand on the inside. Wrap the sock around your foot. Check that the heel is precisely in the stocking's center of the heel pocket. If the heel fits, the inspection hole will be under the foot. It's okay for the stocking to go over the foot on occasion. (The heel square should be in place; if the stocking is too long in the toe area, tuck it into your slipper.)
3. Pull the stocking up to your ankle and tighten it around your calf.
4. Pull the remaining stocking to its maximum length to ensure no creases.
5. Check that the thigh gusset of your full-strength stockings is centered in your inner thigh and that you knees may flex easily.
Tips to make it easier to wear
They are snug, yes. They are what they are supposed to be, that is why they are medically helpful. But this is also the reason why putting on compression socks, particularly around the heel and ankle, can be challenging.
You can form better habits by following this wearing advice.
Use powder
When your skin is either too wet or too dry, a light dusting of talcum powder or cornstarch will assist compression socks to slide-on. If you first applied lotion to your legs, make sure the skin is completely dry before continuing. Because the lotion will make your skin sticky and will make it even harder to wear compression socks
Start from your toes and work it going up
Compression stockings shouldn't be rolled up like regular socks before wearing. Instead, try partially or completely turning them inside out. It could be necessary to hold an open-toed stocking in place at the bottom while pulling it all the way up. Make sure the heel is in the proper position and that it is straight.
Practice how to properly wear them and you’ll master them
It truly does make a difference to take the time to learn how to put on your compression socks. Consider it a wise investment in your own well-being. You are capable of completing this.
However, if you still struggle to put on your compression stockings or have tingling or numbness, consult your physician or physical therapist to ensure that they are the proper fit.
Who should not use Anti-embolism stockings?
Patients with:
Fragile
Skin tissue paper
Gangrene
Recent skin graft
Allergy to the manufacturing material
Cardiac failure
Severe leg edema
Pulmonary edema from congestive heart failure
People with an unusually large or unusually shaped leg
Significant limb deformity that prevents cortical alignment should not wear anti-embolism stockings.
One 2014 study found that wearing socks incorrectly can put too much pressure in certain place. Skin bruising might results from this, especially in older people.
Socks can occasionally become rolled, crumpled, or bunched when they are put on improperly. Accordingly to research, this inhibits blood flow and functions like tourniquet, which turns the pressure around. The outcome is that the socks are no longer functional, which can lead to blood accumulating in the lower legs and ankles.
How to care for anti-embolism stockings?
1. Although hand washing is suggested, machine washing on the gentle cycle with the garment turned inside out is generally acceptable.
2. To clean, use lukewarm water and mild detergent.
3. Do not use bleach or fabric softeners.
4. Thoroughly rinse and air dry. (Please do not tumble dry.)
Anyone is at risk of getting a blood clot, but the risk is significantly increased when appropriate treatment is delayed or neglected. Through the application of graduated compression to the leg veins, anti-embolism stockings can contribute to an improvement in blood circulation in the leg veins.
Anyone is at risk of getting a blood clot, but the risk is significantly increased when appropriate treatment is delayed or neglected. Through the application of graduated compression to the leg veins, anti-embolism stockings can contribute to an improvement in blood circulation in the leg veins.
FAQs
1. What will I do if something unusual occurs while I wear the anti-embolism stocking?
After you have been discharged, please remove the stockings and get in touch with your primary care physician's office if you have any concerns.
2. Can I let someone else borrow my anti-embolism stockings?
Do not lend your stockings to a friend or member of your family because everyone's leg circumferences are different. Putting on a stocking that is the incorrect size can be painful and make any condition feel far worse.
To experience anti-embolism stocking for you leg? Visit Mediworld to shop for the best anti-embolism stockings you can own!
Learn More Now
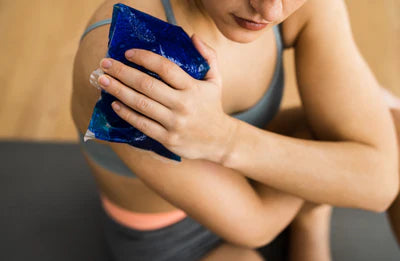
Hot Pack or Cold Pack - Which One To Use and When?
18.07.2024
When you’ve suffered an injury or are struggling with aching joints and muscles you might want to reach for a hot or cold pack to help ease the symptoms at home. But, knowing which treatment is best- hot or cold - depends on the type of injury you have and the effect you’re looking for from the hot/cold pack.
Hot Packs
Hot packs are best used for treating stiff joints, chronic muscles or joint pain in conditions that are long-lasting. Heat treatment is best used 48 hours after an injury is sustained.
But why?
Well, heat therapy works by increasing the circulation around the injured or painful area, helping to relax tight muscles or improve the flexibility and movement of the area.
Applying heat helps muscles to relax, eases tension, improves flexibility, and helps to increase circulation. By applying a hot pack to a tight/tense muscle, you can help to ease tension and improve comfort in this area. While heat can play a role in decreasing tension, it can also cause a body part that is swollen to become more swollen by increasing circulation to the area.
If you apply a heat pack to an area you will quickly see it becoming more red. Thankfully this is not because it’s becoming more painful, but because the heat has encouraged an increased flow of blood and the opening up of the blood vessels. As the blood flow increases, it carries a greater volume of oxygen and nutrients to the affected area, helping to improve ease of movement and reduce the pain, spasms or stiffness in joints, muscles, ligaments and tendons.
Don’t apply heat treatment to a new injury or on an existing one that has recently been aggravated and flared up. If there is swelling, redness or an open wound do not use heat treatment until at least 48 hours after the event. Use cold treatment first, then apply a hot pack when the inflammation has settled down.
Cold Packs
Cold Packs are best used for sprains, strains, bumps, and bruises. Using a cold pack immediately after an injury has happened when there might be sudden swelling, bruising, redness or heat in the area can work effectively to limit longer-lasting symptoms and issues.
Why?
Cold therapy works in the opposite way to heat by slowing down the blood flow to the affected area, decreasing the skin temperature and slowing down the metabolism. The aim with cold therapy is to quickly treat and stop any damage to the tissue.
As well as reducing swelling, Cold packs or ice packs also numb the affected area and reduce the intensity of pain. Cold therapy slows the transmission of the nerve signals that carry pain stimulus to the brain. Ice or cold therapy can slow down the pain receptors and remove the need for painkillers. If properly administered, they’re also free from most allergies or side effects found in pain-killing medicines.
Cold packs can also be used for migraines, tendonitis, dental pain, carpal tunnel and some of the symptoms associated with plantar fasciitis and arthritis.
How to use a Hot or Cold Pack
Once you’ve established which therapy is best to use, apply the hot or cold pack to the affected area and hold for 10 - 20 minutes. Repeat the treatment 3-4 times per day.
If you’re treating an acute or new injury you might benefit from initially using a cold pack to reduce the swelling then switching to a hot pack to increase the healing properties of extra blood flow to the area.
Similarly, if you’re treating with hot therapy you might want to alternate between a hot pack and a cold pack to reduce the inflammation at the end of the hot pack treatment.
Always take care not to burn your skin when using a pack - cold packs can burn too - so wrap a layer of fabric (a clean tea towel works well) around the pack to prevent harm to the skin.
Finally
If it’s acute, swollen and red - use a COLD PACK
If it’s tight, stiff or tense (and not within 48 hours of injury) - us a HOT PACK
Need more help? We're always here to help so get in touch today.
For all your Medical and Homecare supplies give us a call at Mediworld.
We have over 40 years experience in medical, surgical, mobility and home health supplies and we're always on hand to chat if you need support or advice and don't forget to read our other great health blogs!
November 2022
Learn More Now
Using a Cervical Pillow for Neck Pain
30.10.2023
Ever wake up in the morning, ready to conquer the day, but instead of feeling rejuvenated, you're greeted with an unwelcome visitor—neck pain? Ouch! If you've been battling neck pain, you're not alone. It can stem from long hours at the office or our obsession with smartphones. Our poor necks bear the brunt of our poor modern lifestyles.
We all know the importance of a good night's sleep, but what if we told you that a seemingly regular pillow holds the secret to a great night's sleep? Fortunately, many people have learned about the fantastic advantages of cervical pillows as a result of their search for practical solutions to neck aches.
In this post, you will learn about the benefits of the cervical pillow and why you need one for your neck ache.
What is a cervical pillow?
A cervical pillow, also known as an orthopaedic pillow or a contour pillow, is a specialised type of pillow designed to support the natural curve of the neck and promote proper alignment of the spine during sleep. It typically has a unique shape, with a depression in the centre and raised edges on both sides. This design helps cradle the head, neck, and shoulders, providing targeted support to alleviate neck pain, stiffness, and discomfort.
The firmness and height of the pillow can vary to suit individual preferences and sleep positions. The main purpose of a cervical pillow is to maintain the natural curvature of the cervical spine while sleeping, ensuring proper alignment and reducing strain on the neck muscles.
Cervical pillows are commonly recommended for individuals with neck pain, cervical spine issues, or those seeking improved spinal alignment during sleep.
Benefits of Using a cervical pillow
Cervical pillows are specifically designed to help alleviate neck pain and provide relief by addressing several key factors that contribute to discomfort.
Here's how a cervical pillow helps with neck pain:
Support for Proper Alignment:
The cervical pillow's distinctive form and shape are made to support the neck's natural curve and preserve the cervical spine's appropriate alignment. The cushion aids in relieving stress on the neck's muscles, ligaments, and joints by holding the head and neck in the proper posture and aligning the vertebrae. This encourages a neutral spine position, which reduces stress on delicate areas and relieves neck pain.
Muscle Relaxation:
A cervical pillow’s supporting structure aids in relieving tension in the neck muscles. It encourages relaxation by allowing the muscles to relieve the strain and tension built up over the day. The pillow's adequate support stimulates the muscles to relax, which lessens pain and muscular spasms.
Personalised Fit:
Cervical pillows come in various dimensions, forms, and firmness. This makes it possible for people to choose a pillow that meets their requirements and tastes. Personalised support is ensured by selecting a cervical pillow that fits your body form, sleeping position, and comfort level. This is because it provides the perfect amount of support and cushioning where it is most required, a properly fitted pillow can help reduce neck pain.
Improved Circulation:
The area's blood circulation may be improved by proper alignment and relief from strain on the neck. An increase in blood flow aids in the delivery of vital nutrients and oxygen to the neck tissues, which promotes healing and lowers inflammation. A cervical pillow can aid in the reduction of neck discomfort by promoting improved circulation.
Pressure Relief:
Cervical pillows often have a central depression and raised edges. These features help distribute the head's weight more evenly and alleviate pressure on specific areas of the neck. The pillow minimises the likelihood that stiffness, discomfort, and pain may develop in the neck by minimising pressure points.
It's important to note that while a cervical pillow can be beneficial for many people experiencing neck pain, it may not be suitable for everyone or may require an adjustment period. It's recommended to consult with a healthcare professional or a sleep specialist to ensure the proper fit and suitability of a cervical pillow for your specific condition.
Stretches and exercises to pair with a cervical pillow
Pairing stretches and exercises with the use of a cervical pillow can further enhance the benefits and help alleviate neck pain. Here are some stretches and exercises that can complement the use of a cervical pillow:
Neck Stretches:
Neck Flexion: This is done by lowering your chin towards your chest, and feeling a stretch at the back of your neck. Then, slowly tilt your head back, looking up towards the ceiling. Repeat this movement, moving your head forward and backwards, to stretch the neck muscles.
Side Neck Stretch: Tilt your head towards one shoulder, feeling a stretch on the opposite side of your neck. Hold for a little while, then repeat on the opposite side.
Neck Rotation: Turn your head to one side, trying to align your chin with your shoulder. Hold the stretch for a few seconds and then repeat on the other side.
Shoulder Rolls:
This is done by rolling your shoulders forward in a circular motion, starting from a relaxed position and moving them up, back, and down. Repeat the movement in the opposite direction, rolling your shoulders backwards.
Upper Back Stretch:
Stretch your arms out in front of you, interlace your fingers, and round your upper back. Pushing your hands forward will provide a stretch between your shoulder blades. After a couple of minutes, release the stretch.
Posture Exercises:
Put your feet a little bit apart from the wall while keeping your back to a wall. Raise your arms to shoulder height, flex your elbows, and place the backs of your hands, wrists, and elbows on the wall.
Remember, it's important to perform these stretches and exercises gently and without any pain. Listen to your body and stop any movement that causes discomfort.
If you have any underlying conditions or concerns, it's always a good idea to consult with a healthcare professional or a physical therapist for personalised guidance and recommendations tailored to your specific needs.
FAQ: common questions about cervical pillows answered
Q: What is the ideal pillow height for a cervical pillow?
A: The ideal pillow height for a cervical pillow varies depending on individual preferences and body proportions. Generally, it's recommended to choose a pillow height that allows your head and neck to align with your spine in a neutral position. It should neither be too high nor too low, providing adequate support and maintaining proper alignment.
Q: Can I use a cervical pillow if I sleep on my stomach?
A: Cervical pillows are primarily designed for back and side sleepers. Sleeping on your stomach puts strain on the neck and can disrupt the alignment promoted by a cervical pillow. If you prefer sleeping on your stomach, it's advisable to opt for a flatter and softer pillow to reduce neck strain.
Q: How long does it take to get used to a cervical pillow?
A: The adjustment period for a cervical pillow varies from person to person. Some individuals may feel immediate relief and comfort, while others may take a few days or weeks to adapt to the new pillow. It's normal to experience a slight discomfort initially as your body adjusts to the proper alignment and support. Gradually increasing the time spent using the pillow can help with the transition.
Q: Can a cervical pillow help with headaches?
A: Yes, a cervical pillow can potentially help with headaches. Headaches can be triggered by neck tension or poor alignment. By providing proper support and promoting neutral spinal alignment, a cervical pillow may help reduce muscle tension and relieve stress on the neck and upper back, which can contribute to headache relief.
Q: How often should I replace my cervical pillow?
A: The lifespan of a cervical pillow depends on factors such as the quality of materials used and frequency of use. Generally, it's recommended to replace your pillow every 1 to 2 years or when it starts to lose its shape and support. Regularly inspect your pillow for signs of wear and tear, and replace it if it no longer provides adequate support for your neck and head.
Remember, these answers are general guidelines, and it's important to consider individual needs and consult with a healthcare professional or sleep specialist for personalised advice and recommendations regarding the use of cervical pillows.
In conclusion, using a cervical pillow for neck pain has shown great potential in symptom relief and raising the general quality of life for people who experience it. Proper use of the cervical pillow, helps to align the cervical spine, resulting in better sleep quality and less discomfort.
Mediworld offers unique cervical pillows to ease that neck pain and assure you comfort. To order yours right away our message box is always open.
Do you require further assistance? Please contact us right away; we're always happy to assist.
Call Mediworld for all of your medical and homecare supply needs.
We have more than 40 years of expertise in the fields of medical, surgical, mobility, and home health supplies, and we're always available to speak if you need assistance or guidance.
Lastly, don't forget to check out our other fantastic health blogs!
Learn More Now
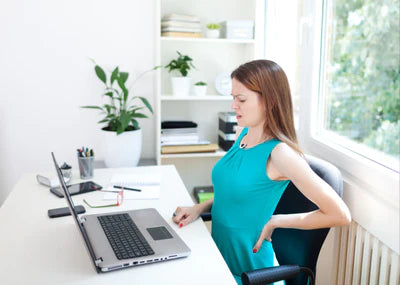
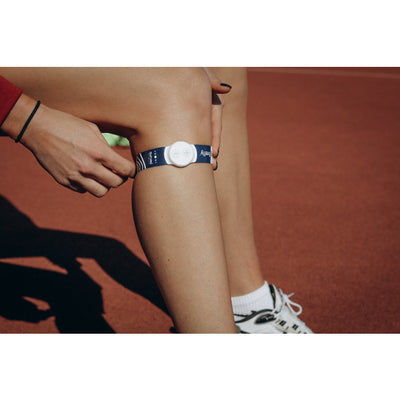
Is Working From Home a Pain in Your Back?
18.07.2024
Working from home does come with its perks, but back pain associated with sitting at badly set up desk areas is not one of them!
Pair that with our decreased lack of activity and the extra stresses brought on by the increasingly blurred lines between work time and leisure time, it’s fair to say that the spines of the nation are not looking in good shape.
So, whether you’re working from home or just regularly sit for long periods of time in front of the computer, try these top tips to keep you ‘back aware’ with a strong, pain free back for life.
Here are some simple ways you can look after your back if you’re working at your desk from home right now.
Sitting Correctly
Check your sitting position. Sitting on the edge of the chair will help to keep your spine upright and your posture in a good, neutral position. This will strengthen your core muscles which support good back function all round.
Avoid sitting for long periods in soft, ‘comfortable’ chairs. Even worse, do not sit in your bed to work! Your back needs a harder seated surface to allow good posture to occur.
If you can, use a standing desk. If you don’t have a custom made one, you can raise your computer or laptop onto some boxes or books to elevate your workstation. Standing is always better than sitting.
If you’re struggling to find a comfortable position while seated use a lumbar support fitted to the back of your chair or a comfortable curved back cushion to help with sitting in a good position all day
Don’t tuck your feet under your chair when seated. Keep your feet flat on the floor with your legs bent at a 90 degree angle. You can also stretch your legs outwards while sitting which helps to maintain and improve hip function and mobility.
Back Strengtheners
Swimming, yoga and pilates are great exercises for strengthening the back, without high impact on the joints.
Try some simple stretching exercises using exercise bands - for example upright rows, arm extensions or wide arm stretches. The resistance in the bands will help to quickly build strong back and shoulder muscles and these exercises can be done in just a few minutes each day while you take a break from your desk.
Do some full-range hip movement exercises - try lying on your back with your feet flat on the floor and knees bent. Gently lower both legs/knees to each side while keeping your back flat on the ground.
Keep moving! If you do nothing else, make sure you get up from your chair and walk around every 20 minutes.
Still in Pain?
Although back pain in most cases will clear up after a couple of days it’s absolutely essential that you immediately seek urgent medical care if your pain persists or if you experience any of the following symptoms:
Numbness in your legs or bottom
Loss of sensation or control in your bladder or bowel
Numbness in your lower back and back passage
Sudden, severe spinal pain when lying down
Tenderness in the spine
Need more support? We're always here to help.
For all your Medical and Homecare supplies give us a call at Mediworld.
We have over 40 years experience in medical, surgical, mobility and home health supplies and we're always on hand to chat if you need support or advice - don't forget to read our other great health blogs!
February 2022
Learn More Now
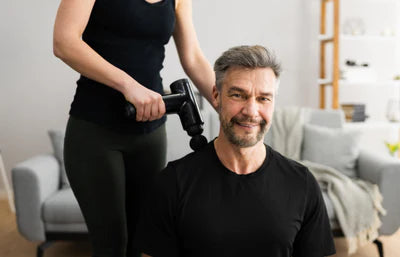
Tips on using a Massage Gun for Pain Relief
18.07.2024
In recent years, handheld massage guns have skyrocketed in popularity, swiftly becoming the go-to gadget for post-exercise rejuvenation. Yet, these modern marvels aren't just reserved for the muscle-sore athlete. Imagine wrapping up a grueling day at the office; your muscles tense from hours in that unforgiving chair. Or perhaps you're nursing an old injury that brings waves of muscle pain. A massage gun could be your ticket to instant relief and relaxation in such scenarios- and many more.
In this article, we'll go over small tips to make the most of your massage gun. We aim to equip you with everything you need to know. Whether you're a fitness enthusiast, a desk-bound professional, or someone navigating the challenges of chronic pain, prepare to discover how this tool can promote muscle health and well-being.
How do Massage Guns work for Pain Relief? Understanding the Science
At the core of a massage gun's function is the principle of percussive therapy. Think of it as a rhythmic dance on your muscles—each beat or pulse invokes a therapeutic response. This rhythmic "dance" significantly enhances blood circulation to tense, injured, or painful areas.
On that topic, let's talk about blood flow. Increased circulation doesn't just mean that more blood is reaching your muscles. It signifies a rush of oxygen and vital nutrients to the sore areas of the muscle. This natural healing process accelerates repair and rejuvenation, alleviating pain and discomfort.
But what about when your muscles feel tied in knots, even without a strenuous workout or evident injury?
Those pesky muscle knots are known as fascia—a mysterious, web-like connective tissue enveloping your muscles. Over time, due to stress, sedentary lifestyles, or physical strain, adhesions or "knots" form in the fascia. These are like traffic jams on a highway, blocking smooth movement and causing pain. Massage guns, with their targeted pulsations, act like skilled traffic officers, breaking up these adhesions and restoring free flow.
In essence, the magic of massage guns lies in their ability to blend modern technology with the age-old principles of massage therapy. They offer a hands-on approach (quite literally!) to muscle health, ensuring that your body remains a well-oiled machine, ready to tackle life's challenges head-on!
So, where exactly can this modern masterpiece work its wonders?
Where Can You Use Your Massage Gun?
The beauty of the massage gun lies in its adaptability. You can use the massage gun on multiple areas on your body.
So, where exactly can this masterpiece work its wonders?
A Panacea for Pain: Whether it's the nagging ache in your shoulders from hours at the computer, wrist pain from excessive typing or discomfort in your hips from that ambitious run, the massage gun is your masseuse. From your fingers to your feet, it can address pain across your body—the back, glutes, or calves.
Navigating Nooks and Crannies: We've all had those moments—trying to massage a cramp between our toes or the small of our back, only to find our fingers too cumbersome. Modern massage guns come equipped with various attachments tailored for such challenges. These innovative tools ensure that even the most elusive corners of your body receive the therapeutic touch they deserve.
Targeted Relief for Arthritis: Arthritis, with its persistent inflammation and pain, can be debilitating. While a massage gun can offer respite by enhancing blood flow and relaxing stiff muscles, always tread cautiously. They can provide guidance tailored to your specific condition and needs, but you should always consult your GP beforehand.
In essence, the massage gun is your versatile partner in well-being—a tool that, with its range and precision, seeks to ensure every inch of you is free from pain and primed for peak performance. As with all things health-related, while it's a powerful ally, always ensure you use it judiciously and in consultation with healthcare professionals.
Where Shouldn't You Use Your Massage Gun?
While massage guns are a fantastic tool for most parts of the body, they aren't a universal solution. When using your massage gun, you must recognise which areas to treat with care or avoid altogether.
Let's dive into these "no-zones" to ensure safe and effective use.
Delicate Neck and Head: The neck and head are sensitive regions packed with vital structures, including major blood vessels, nerves, and the spinal cord. Using a massage gun in these areas can risk injury. Always tread with caution and, when in doubt, consult a professional.
Fresh Injuries: It's instinctual to attend to a freshly injured muscle, but introducing percussive therapy can worsen the damage. Inflammation is the body's initial response to injury, and agitating it with a massage gun can lead to increased pain or prolonged recovery. Always give injured areas time to heal, and consult a medical professional before introducing any form of therapy.
Vulnerable Bones and Joints: A sprained ankle or a broken wrist might scream for relief, but a massage gun isn't the answer here. Applying percussive pressure on or around compromised bones or joints can exacerbate the injury, delaying healing or causing further harm.
Problematic Veins and Specific Conditions: Varicose veins aren't just cosmetic concerns. They indicate weakened blood vessels, and direct pressure can lead to complications. Similarly, gout, characterized by painful joint inflammation, can be aggravated by percussive therapy. It's essential to steer clear of these areas or, better yet, seek guidance on alternative relief methods.
While the massage gun is a formidable ally in the fight against pain and muscle tension, it's vital to use it wisely. Understanding its limits ensures you reap the maximum benefits while sidestepping potential pitfalls.
How Do I Use My Massage Gun?
It may seem like an easy-to-use tool, but follow this step-by-step guide to guarantee results.
Starting Slow and Steady: begin with brief 15-30 second sessions on the target areas. This helps you acclimate to the sensation and ensures you don't overstimulate the muscles. We advise you to start with the lowest speed and gradually increase as the massage continues or what feels comfortable for you.
Perfecting the Technique: Technique is paramount. Begin by positioning the massage gun at the start of the sore muscle. Move it methodically from one end to another, avoiding bones and sensitive joints like the knees and elbows. After a linear motion, use gentle circular movements. This combination helps stimulate blood flow and eases tension, offering a comprehensive treatment.
The Importance of Recovery: Muscles need downtime. After a session, allow the treated area to relax and recover before going for another round. For optimum results, aim to repeat the massage process once or twice daily until you notice a decline in soreness.
Check out our specific tips for key massage spots:
Core and Back: Gently glide the massage gun up and down your back muscles, avoiding the spine. You can apply slight pressure for areas with more muscle density, like the lower back. But always avoid pressing directly on the bone.
Limbs - Arms and Legs: Sweep the device slowly along your limbs, covering the muscle groups comprehensively. When encountering sore or tight spots avoid pressing too intensely. For leaner areas like forearms or calves, use a lighter touch.
Shoulders and Neck: Approach these areas with caution. Glide over the shoulder muscles, ensuring you're targeting the muscle, not the collarbone or neck. Always avoid the direct neck area to prevent injury.
Hands and Wrists: Given these areas' delicate nature, lightly brushing the massage gun head over them is recommended. Steer clear of pressing deeply, instead opting for a gentle, sweeping motion.
Feet and Ankles: Your feet bear the brunt of daily activities. While massaging, ensure you're focusing on the fleshy parts of the foot, like the arch and heel. Avoid pressing directly onto bones, especially around the ankle.
Glutes and Thighs: These beefy muscle groups can handle more intensity. Glide the massage gun up and down the muscles, adjusting pressure based on comfort. However, when nearing the hip joint or knee, reduce the pressure and avoid direct contact with bones.
Massage guns offer muscle therapy in your own home. It's all about knowing how to use it right for you and your body. Need more help to buy the right massage gun for you? We're always here to help, so get in touch today.
For all your Medical and Homecare supplies, call us at Mediworld.
We have over 40 years of experience in medical, surgical, mobility and home health supplies, and we're always on hand to chat if you need support or advice. Follow us on Twitter and Facebook, and don't forget to read our other great health blogs!
Learn More Now
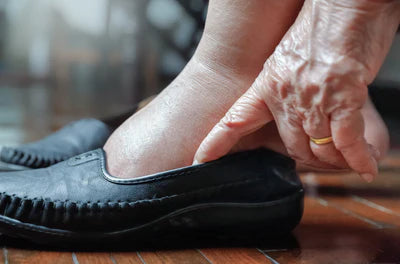
Treating Swollen Feet and Ankles
18.07.2024
Have you ever had a long day at work or school, so long that by the end of the day, your feet were swollen and throbbing? Did your ankles look like balloons and was walking painful?
Terrifying as it might be, especially the first time they happen, experiences like this are quite common and can occur for several reasons. Better still, there are simple ways to relieve the aching and ease the swelling so you don't have to experience the discomfort anymore.
This blog post will walk you through the common causes of swollen feet and ankles, as well as easy home remedies to deal with it.
Common Causes of Swollen Feet and Ankles
Swelling in your feet and ankles is no fun, and can be very uncomfortable. In order to be able to treat it though, having a basic knowledge of its possible causes is important, and there are several of them:
Standing or sitting for long periods: When you're inactive, fluid can pool in your lower extremities. Regular walk breaks, elevating your feet, and flexing your ankles to maintain circulation are all immediate remedies for this.
Eating too much salt: Excess sodium in your diet causes your body to retain water, which leads to swelling. Cutting back on salty foods can actually help your feets in the long run!
Pregnancy: Carrying the extra weight of a baby puts pressure on your veins, and hormonal changes do cause fluid retention. Lying on your left side, soaking your feet in cool water, and wearing supportive stockings have been known to help reduce the occurrence of a swollen leg and ankle. However, the swelling is temporary and usually improves after delivery.
Medications: Some drugs like blood pressure medications, steroids, and Non-steroidal anti-inflammatory drugs(NSAIDs) can cause fluid buildup as well. Talk to your doctor about alternative treatments or dosages when you notice such symptoms.
Underlying condition: Swelling can sometimes signal an underlying issue like heart, liver or kidney disease. See your doctor right away if the swelling is severe, painful, or does not improve with self-care. They can determine if any testing is needed where necessary.
Do not let swollen feet get you down. With a few lifestyle tweaks, the right remedies, and medical care if needed, you'll be back on them in no time and feeling comfortable again!
Diagnosing the Underlying Condition
Swelling in your feet and ankles can be caused by a wide range of conditions, so the first step to treating it is usually determining the underlying issue. The good news is, most cases of swollen feet and ankles can be easily managed once the cause is determined.
Sometimes, the cause can be a circulation problem, like with varicose veins or blood clots, preventing blood and fluid from flowing properly. In situations like this, elevate your legs, apply a warm compress, and see your doctor about medical procedures to improve circulation.
Kidney or heart disease can also lead to fluid buildup, so if swelling is severe or doesn't improve after initial home remedies, consult your physician right away for diagnosis and treatment. They may prescribe diuretics or other medications to reduce fluid retention if this is the case for you.
Lifestyle factors like lack of exercise, excess salt intake, or prolonged sitting or standing are some of the most common factors to blame for swollen feet and ankles. Making an effort to move around regularly, limiting sodium intake, and giving your feet a break when possible helps reduce the likelihood of experiencing it. Losing excess weight can help too as it takes pressure off your veins and joints.
Allergic reactions or injuries can also cause temporary swelling. During situations like this, apply some ice, take an antihistamine, and see if symptoms subside. If not, call your doctor.
Try not to worry when you find yourself having to deal with swollen feet and ankles. Stay optimistic, follow your doctor's recommendations, and make healthy lifestyle changes, and your feet will be back to normal before you know it!
Home Remedies to Relieve Swollen Feet and Ankles
There are many simple home remedies you can try to relieve the discomfort of swollen feet and ankles. Giving the ones that apply to you a go will go a long way to relieve you of the discomfort that comes with swollen feet and a swollen ankle.
Elevate Your Feet
Raise your feet up when sitting or lying down. This helps reduce fluid buildup in your ankles and feet.
You can:
Prop your feet up on pillows or a footrest while sitting.
Lie down and place pillows under your feet so they're slightly higher than your heart.
Sleep with an extra pillow under your feet at night to keep them elevated.
Keeping your feet up is one of the simplest yet most effective ways to relieve swelling. The higher your feet are, the more fluid drains away from them.
Apply Cold Compresses
Cold reduces inflammation that contributes to swelling. Apply cold compresses such as ice packs, cold washcloths, or bags of ice/frozen vegetables to your ankles and feet for 10-15 minutes at a time, a few times per day. The cooling sensation also makes your feet feel so much better instantly.
Exercise Regularly
While it may seem counterintuitive, exercise actually helps prevent and reduce swelling. When you move your body, your leg muscles contract and help pump fluid back up to your heart. Try:
Walking: Go for walks daily, even if just for 15-20 minutes. Walking is easy on the joints but provides effective circulation benefits.
Ankle rotations: Rotate your ankles in circles, first in one direction and then the other. Do 2-3 minutes at a time, a few times per day.
Calf raises: Lift your heels so you're on your tiptoes. Hold for a second, then lower back down. Repeat for several reps, a few times per day.
Exercise, combined with elevation and cold compresses, can significantly decrease swelling and get you back on your feet comfortably again. Stay active and mobile - your feet and ankles will thank you!
Limit Salt Intake
Swelling is a result of your body retaining extra fluid when you eat a diet high in salt. Limit your intake of processed meats, canned soups, pizza, chips, pretzels, and other salty foods. Additionally, refrain from salting your food extra. Your salt intake can significantly affect how much fluid retention and swelling you experience.
Drink Plenty of Water
Staying hydrated helps your body flush excess fluid and waste products. Aim for 6-8 glasses of water per day to aid circulation and minimise swelling in your feet and ankles.
Soak Your Feet
A warm foot soak is soothing and helps reduce swelling. Add 2 cups of Epsom salt to a foot bath or bucket filled with warm water. Soak your feet for 15-20 minutes. The magnesium in the Epsom salt helps draw fluid away from your feet and ankles. Do this a few times a week until the swelling subsides.
When to See a Doctor About Swollen Feet and Ankles
When your feet and ankles remain swollen for more than a couple of days, it’s time to call your doctor. While minor swelling is usually nothing to worry about and will go down on its own or with self-care, persistent or severe swelling can indicate an underlying condition that requires treatment.
See your doctor right away if:
Your swelling is accompanied by chest pain, shortness of breath, or confusion. This can signal a heart or lung problem and requires emergency care.
One or both of your calves become red, warm, or tender. This can indicate a blood clot known as deep vein thrombosis (DVT) and needs immediate attention.
Your swelling is caused by an injury like a sprain, fracture, or torn tendon. You may need physical therapy, bracing, or in severe cases, surgery to repair the damage.
See your doctor within a day or two if:
Your swelling is accompanied by fever or chills. This can indicate an infection that requires diagnosis and treatment like antibiotics.
The swelling is severe or does not improve with self-care. Your doctor may order blood tests, urinalysis, imaging scans or other tests to determine the underlying cause such as kidney, liver or thyroid disease.
You have swelling in one limb or on one side of your body. This can indicate a blockage in the veins or lymphatic system that may need treatment to prevent complications.
Even though swollen feet and ankles are usually not an emergency and will often go down on their own or with home treatments, persistent or severe swelling should not be ignored. Call your doctor right away or within a couple of days if your swelling is accompanied by other symptoms or does not start to improve. They can determine if any tests or treatment are needed to reduce your swelling, relieve any discomfort, and address any underlying conditions.
Conclusively, You don't have to suffer through painful swollen feet and ankles. There are many simple remedies you can try right at home to find relief. You can elevate those legs, apply cold compresses, exercise gently, cut back on salt, drink plenty of water to stay hydrated and improve circulation, reduce inflammation with turmeric or arnica, and give yourself a soothing foot massage with essential oils like peppermint, lavender or lemongrass.
Within a few days of following these tips, you'll be back on your feet and enjoying your usual activities once again. Take action now and get ready to slip into your favourite shoes pain-free. Your feet will thank you for it. Stay positive, keep smiling, and remember - this too shall pass!
If the symptoms don't improve after a few days or if the swelling gets worse, the National Health Service(NHS) recommendation is to consult your general practitioner(GP).
For all your Medical and Homecare supplies give us a call at Mediworld.
We have over 40 years experience in medical, surgical and home health supplies and we're always on hand to chat if you need support or advice. Follow us on Twitter and Facebook.
Learn More Now